¶ How to Set a Server Name
If you wish to change the name of your Rust server, so that it appears different in Rust, you need to open your server in the panel.
Then, click Setting > General

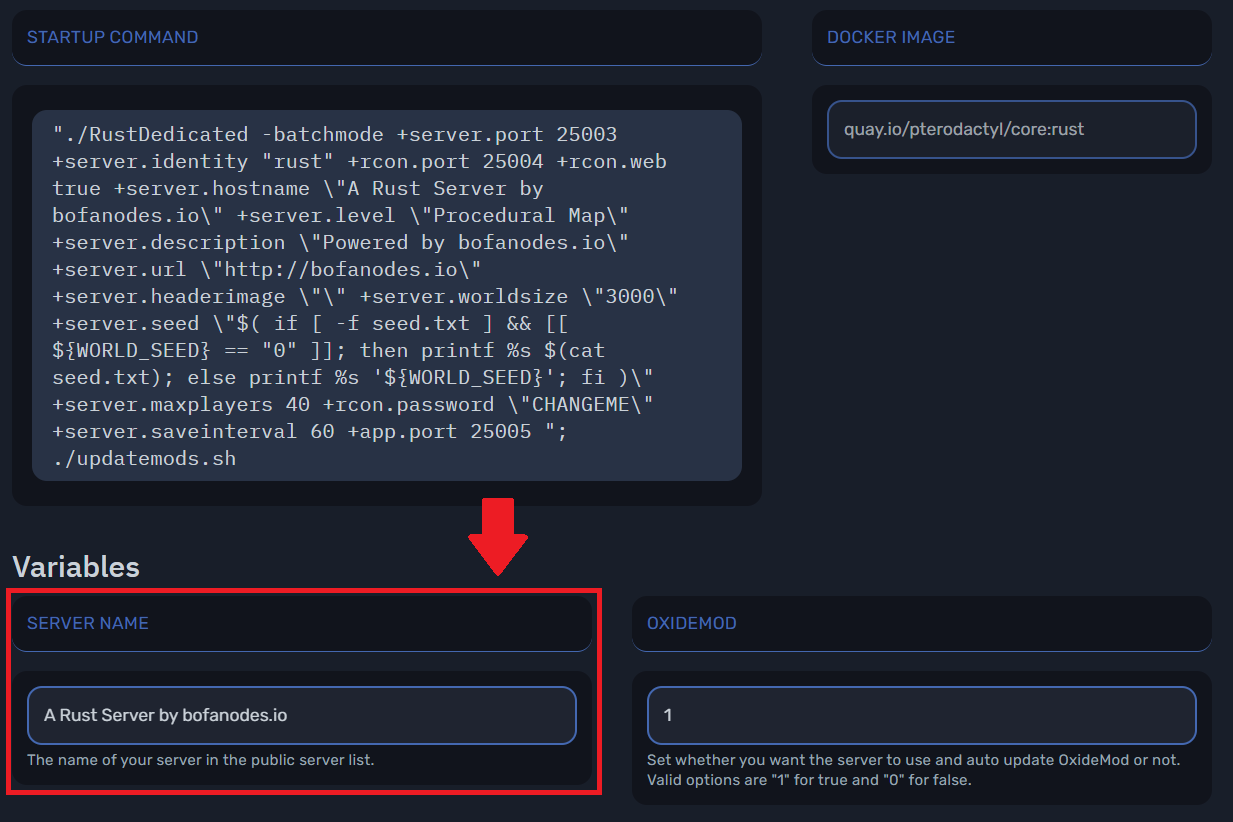
Once in, you should see a variables section and just benneth it should be the Server Name variable. In the box, you can change the server name.
Once this is saved. Start your server back up and when you see the server in Rust, it should have the new name on it!
¶ How to Increase Gather Rates
Installing the Plugin
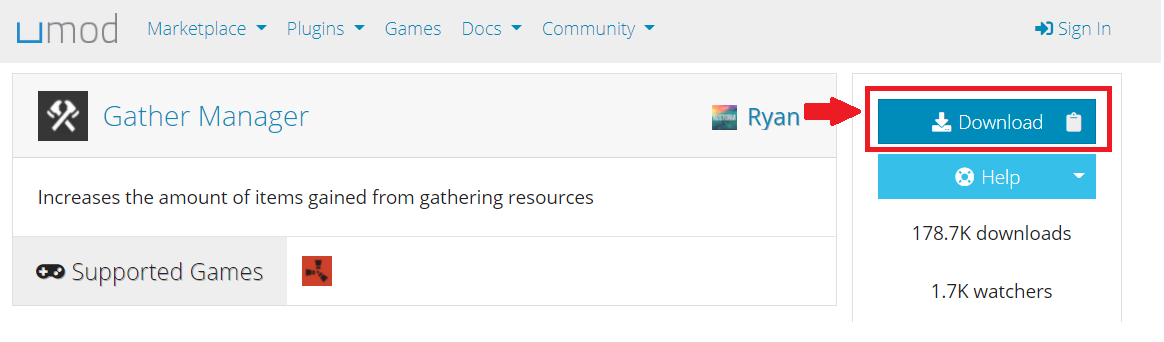
To increase or decrease gathering rates we will need to download a oxide plugin.
To find it click here, and download the file. It should be called "GatherManager.cs".
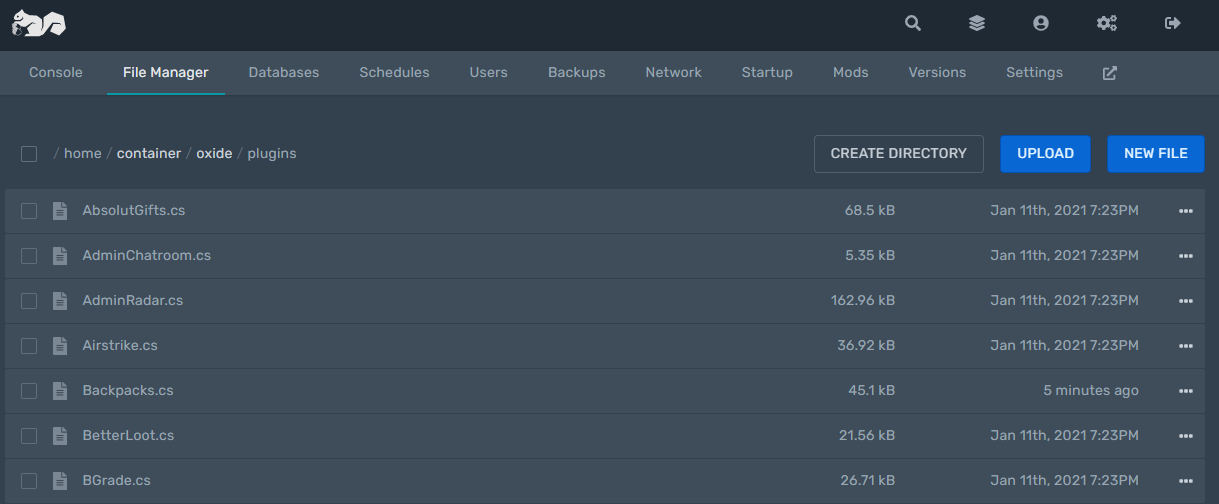
Once you have downloaded the file, go to your server page on the panel, make sure your server is not running, then click on File Manager button.

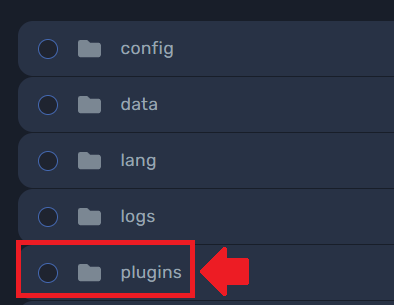
Then find the oxide folder.

Inside you should open the "Plugins" folder.
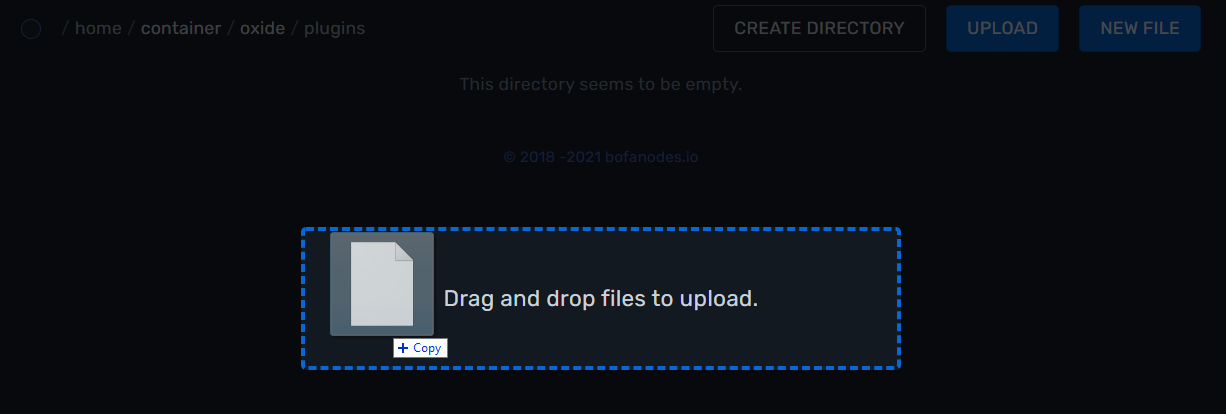
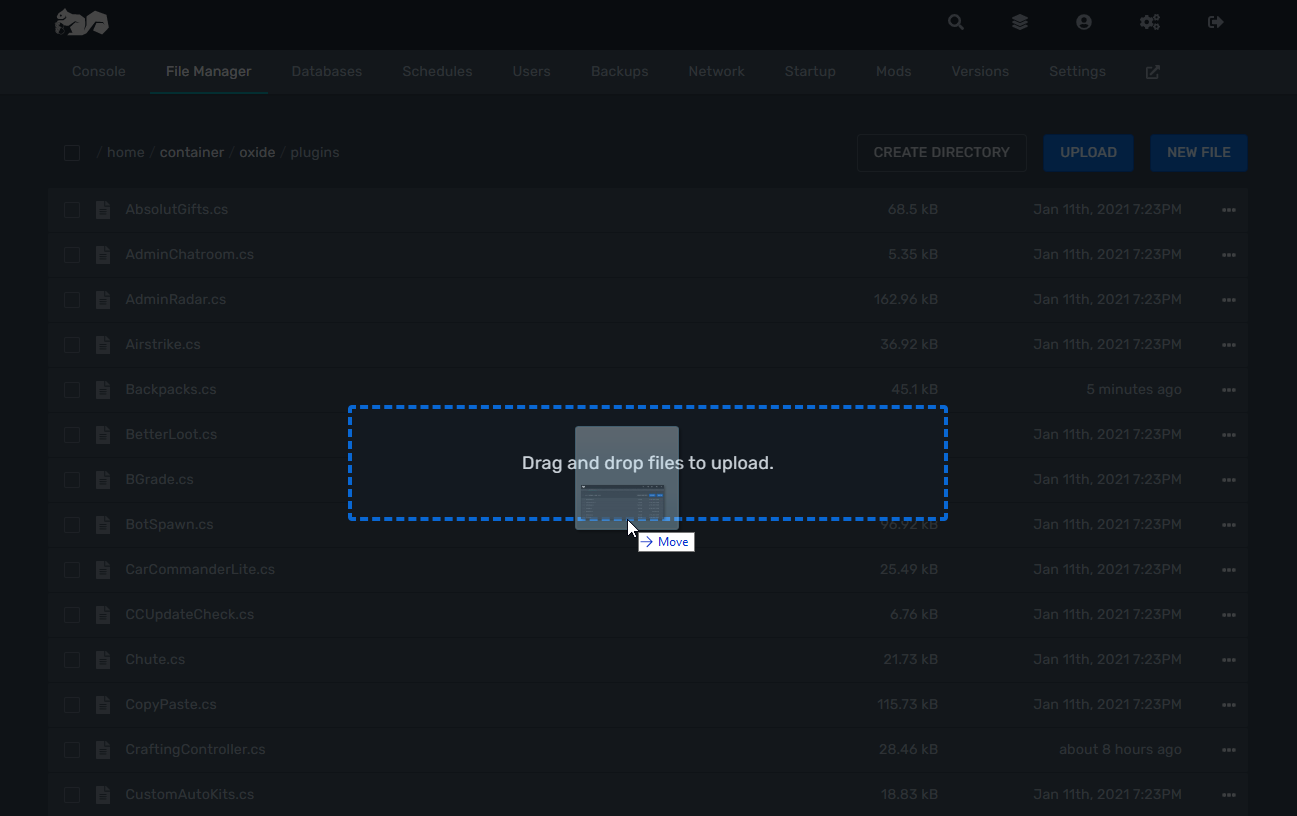
If this is your first plugin the folder should be empty. To put the plugin into your server, open your downloads file up and drag the "GatherManager.cs" file you downloaded eariler onto the webpage. Once you release the mouse it should upload the file to the server.
Changing the Gathering Rate
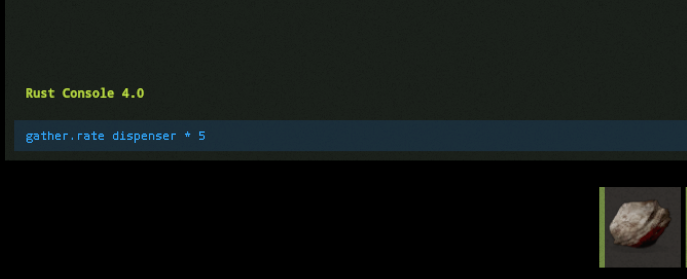
Once you have uploaded the plugin to your server files, go ahead and start the server back up. Once it is running, launch Rust and login onto your server. When you get in, hit F1 to bring up the Rust console and type in "gather.rate dispenser * 5"
Please Note: In this example we are increasing the gathering rate of everything on the server by 5. You can modify this rate by simply changing the number at the end of the command.
If you wish to modify gathering rates for specific resources, you can find other commands on the website for the plugin here.
¶ How to Add Your Server To Steam Favorites
To add your server to steam favorites, you have to first load up steam and navigate to the top left corner where you see the Store and Library icons like so:

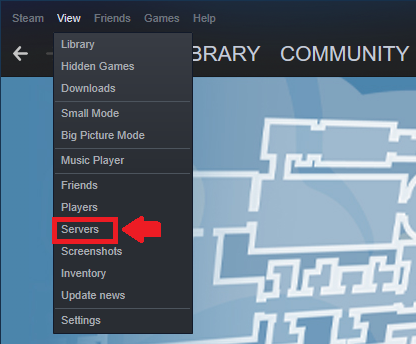
Then, click on the view icon and find the Servers tab.
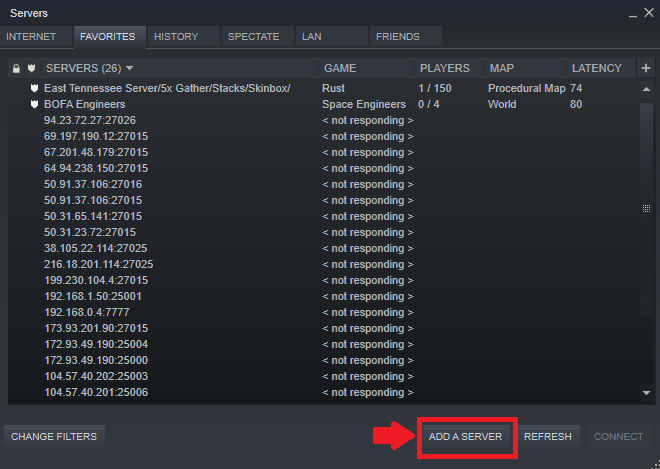
Go ahead and click on the Servers icon and it will bring up this:

Now, click on the add servers button at the bottom right corner of the application
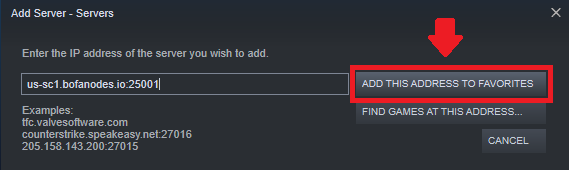
This will bring up another application that will ask you to input the IP address of your server, go ahead and open your server up in the panel and navigate to the top left corner. Your IP address will be listed under your severs current status.
If you click on it it will copy the IP to your clipboard. Now, go back to the server IP application and paste it into the empty field and click "Add This Server to My Favorites".
If this is successful, your server should show up in your server list like so.
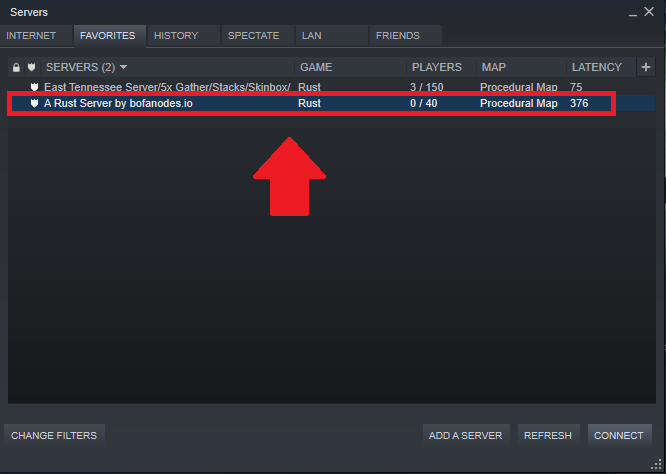
This will add the server to your Steam favorites. You can now click on it from this menu and click connect and you will boot up Rust then automatically join the server.
Also, if you just boot up Rust and inspect your favorites in the server viewer, your server should now be there!
¶ Player Banning
¶ How to Ban A Player
Banning By Player Name:
To ban a player that is currently in your server you can ban them by using their player name.
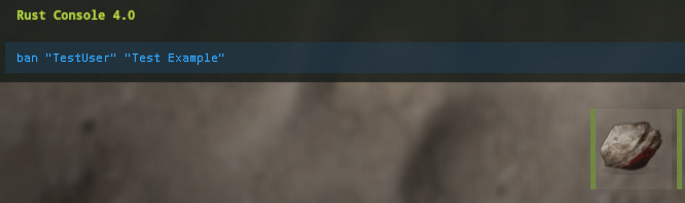
To do so, press F1 to open up the Rust console. Then type in the following format: [ban "player_name" "optional_reason"] into the console.
Make sure that you have the "player name" as their name appears in the server. You may also give a reason for why they are being banned in the "optional_reason" section.
¶ How to Unban A Player
Unbanning By Steam ID:
To unban a user from your server, you are going to have to use their steam ID
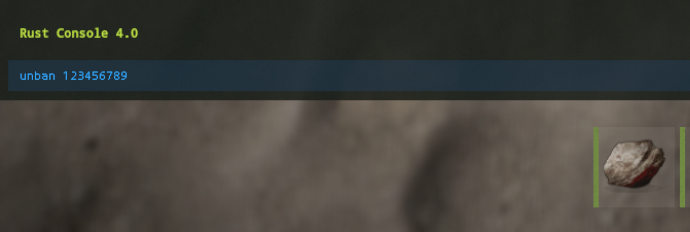
To do so, press F1 to open up the Rust console. Then type in the following format: [unban steam_id] into the console.
Make sure that you have the "steam_id" correct or you will not unban the user. To find a users steam ID load up their steam profile and copy their page url as you would from your own profile page in our finding your steam ID guide here.
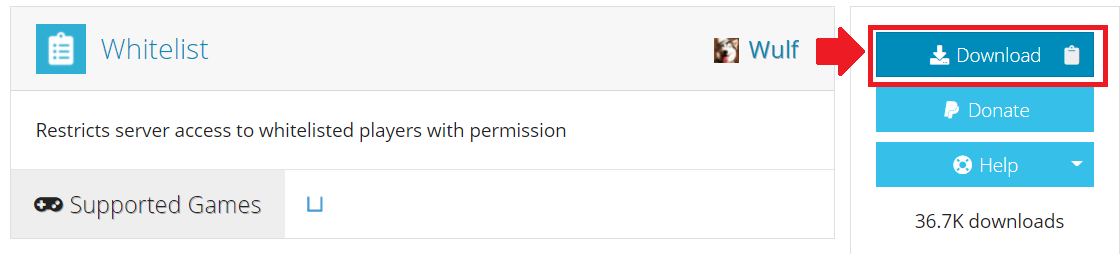
¶ How to Whitelist your Server
To whitelist your server, you must download the whitelist plugin for oxide. You can find the download here. It should give you a file called, "whitelist.cs".
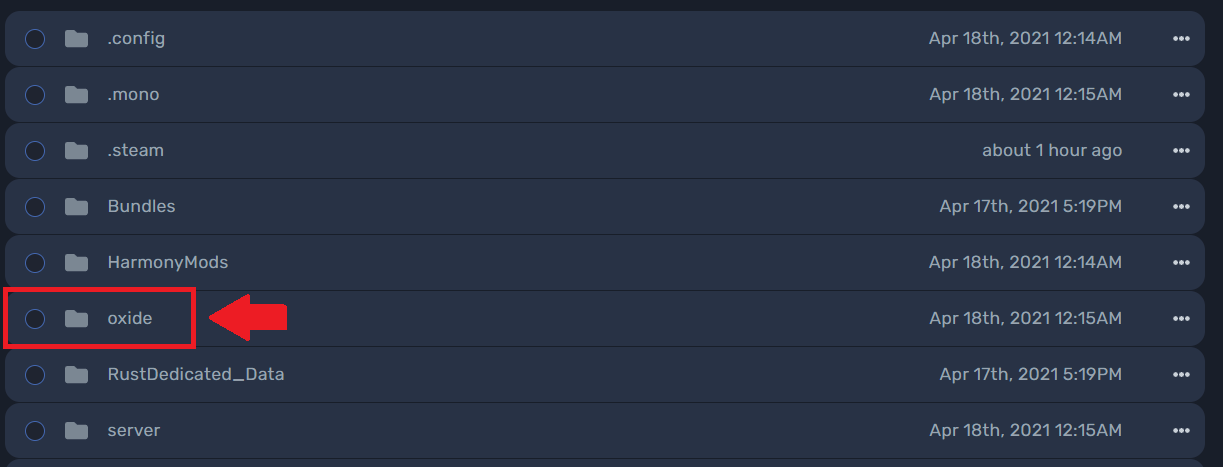
Once you have the file, open up your server on the panel and open the file manager.

Then open the oxide folder.
Then open the plugins folder.

Once in the folder, you must pull up the "whitelist.cs" file you downloaded from your downloads and click and drag it onto the panel webpage to upload it.

Once uploaded, you can start your server back up and hop into it. When you load in you can press F1 to open the Rust console, then type "oxide.grant user 1234567890 whitelist.allow". However, you will replace the 123456789 with the steam ID of the user you wish to be able to join the server. If you do not know how to find the steam ID of a user, please look at our guide for finding the steam ID here.
Go ahead and do this for every user you want to be able to connect to your server. Please Note: Admins are allowed to join a whitelisted server, even if they are not added to the whitelist by default.
¶ How to Change Your Server Description and Header Image
Please Note: Make sure your server is offline and not running before attempting anything in this guide!
To modify these, you must open your server on the panel and open the file manager.

Then you must find the server folder.

Now go ahead and open the server identity folder. This folder might just be called "rust".

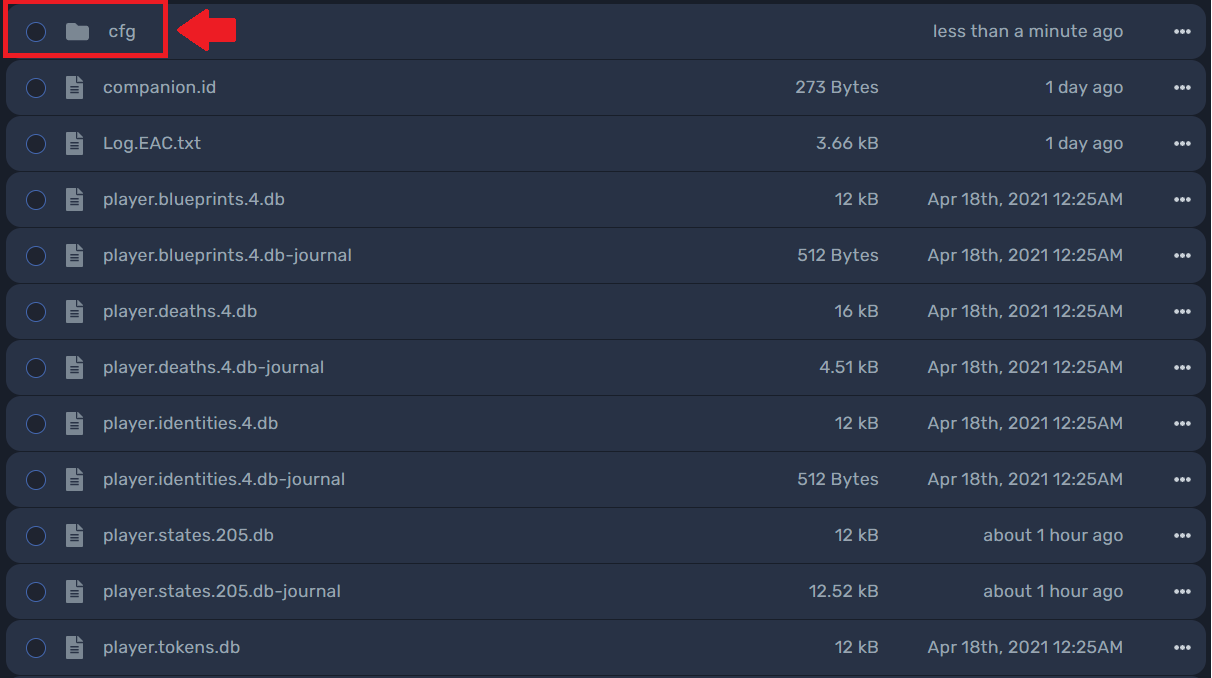
Once inside, open the cfg folder.

Inside this folder, look for the server.cfg file. If it is not there you are going to have to create the file itself. To do so, just navigate to the top right corner and click New File.

Once you do this the editor will open. To save the correct name of the file, click on the Create File button in the bottom left.

Now that file is created, click on it to bring it up and now paste these line formats: server.url "link-to-website , server.description "Your description " , server.headerimage "link-header-image.
Once this is pasted, you can replace the "link to website with a url to the website you want the users to see, "Your description" for whatever you want the server description to be, and "link-header-image" with the link to your desired header image.
Banning By Steam ID:
Another way to ban a user is to ban them by their steam ID. This is useful if the user has disconnected from your server or is just not online.
To do so, press F1 to open up the Rust console. Then type in the following format: [banid "steam_id" "optional_reason"] into the console.
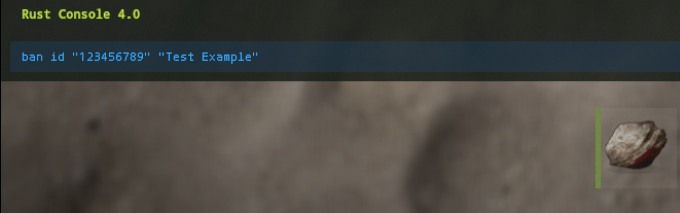
Make sure that you have the "steam_id" correct or you may end up banning someone else. To find a users steam ID load up their steam profile and copy their page url as you would from your own profile page, as you would in our guide for finding your steam ID, located here. You may also give a reason for why they are being banned in the "optional_reason" section.
¶ How to Change the World Size and Size
Please Note: If you currently have a map generated, you must reset it before continuing. If you have not done this you can find steps on how to do it here.
If you want to use a world size and seed and know what your world will look like, you can visit http://playrust.io/gallery/.
World Size
To change the world size and seed, load up your server on the panel and click the Startup tab.

Once in, you must scroll down to where the world size variable is located.
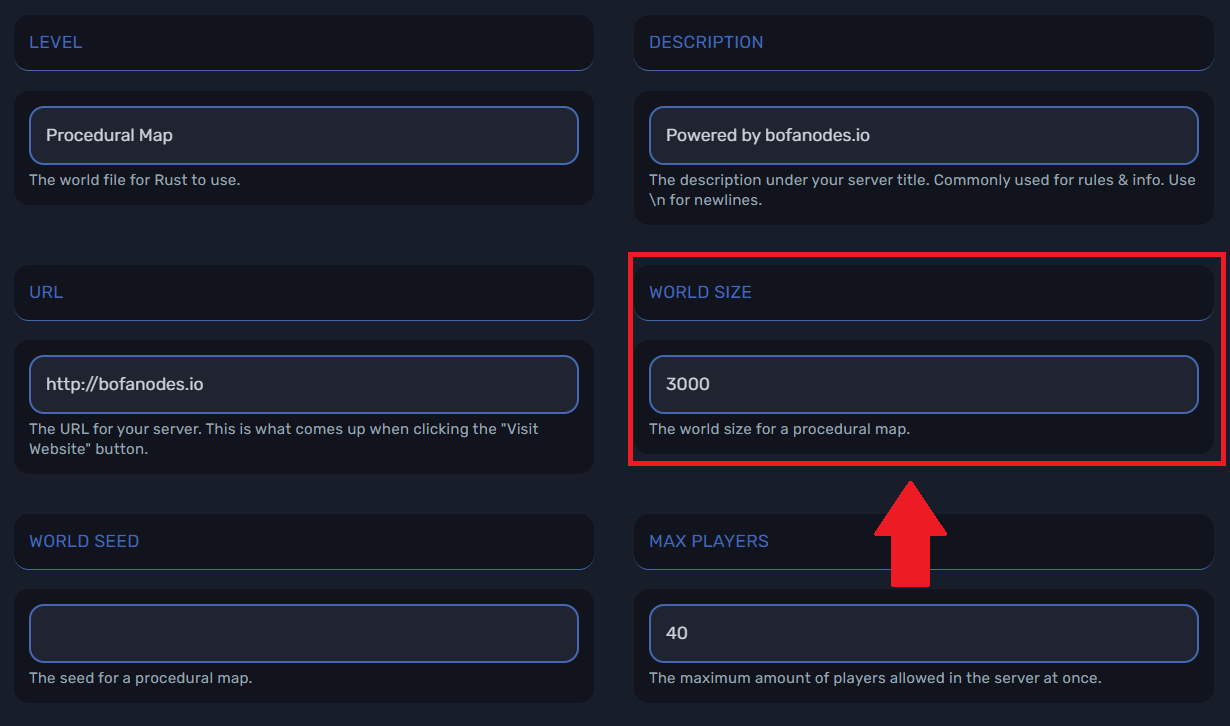
Here you can modify the world size value. It can range from 1 to 6,000. So keep in mind how big you want your world.
World Seed

Here you can modify the world seed value.
¶ How to Find your Steam ID
How to Find Your Steam ID
To find your Steam ID, open up your steam client and navigate to your steam profile and right click in the background and copy your page URL like so:
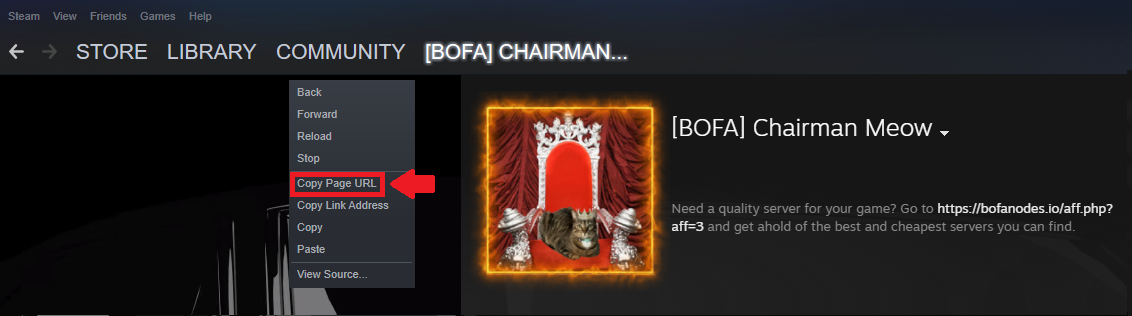
In that URL you will find a line of numbers at the end of the link, for example: steamcommunity.com/profiles/123456789/
That is your Steam ID.
¶ How to Increase Item Stack Limits
Installing the Plugin
To increase or decrease gathering rates we will need to download a oxide plugin.
To find it click here, and download the file. It should be called "StackSizeController.cs".
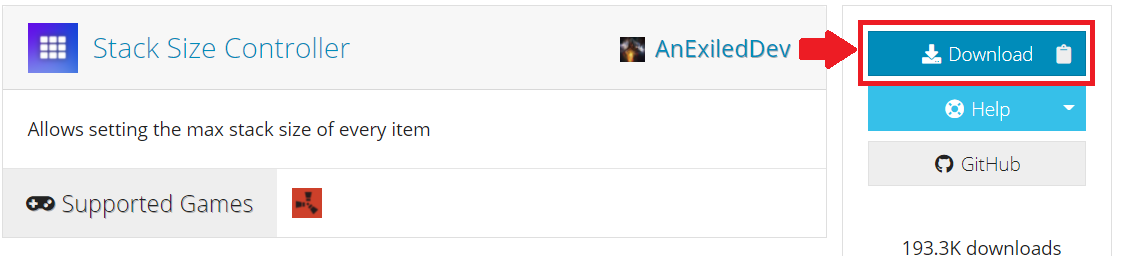
Once you have downloaded the file, go to your server page on the panel, make sure your server is not running, then click on File Manager button.
Then find the oxide folder.
Inside you should open the "Plugins" folder.
If this is your first plugin the folder should be empty. To put the plugin into your server, open your downloads file up and drag the "StackSizeController.cs" file you downloaded earlier onto the webpage. Once you release the mouse it should upload the file to the server.
Changing the Stack Limits
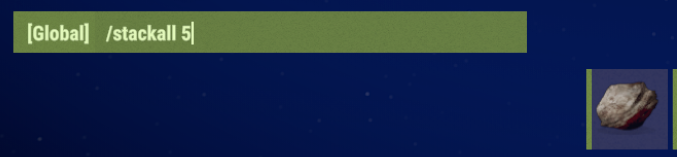
Once you have uploaded the plugin to your server files, go ahead and start the server back up. Once it is running, launch Rust and login onto your server. When you get in, hit T to bring up the Rust chat and type in "/stackall 5"
Please Note: In this example we are setting the stack limit of everything on the server by 5. You can modify this limit by simply changing the number at the end of the command.
If you wish to modify stack limits for specific resources, you can find other commands on the website for the plugin here.
¶ How to Insert A Custom Map
Please Note: Your server should not be running while attempting anything in this guide
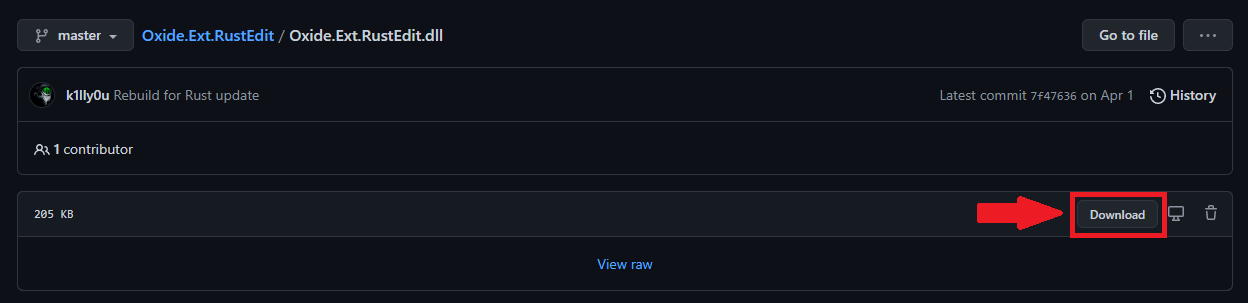
Installing The Extension:
To be able to import your custom Rust map, you must first have the RustEdit Oxide extension. You can find the download for the "Oxide.Ext.RustEdit.dll" file here.
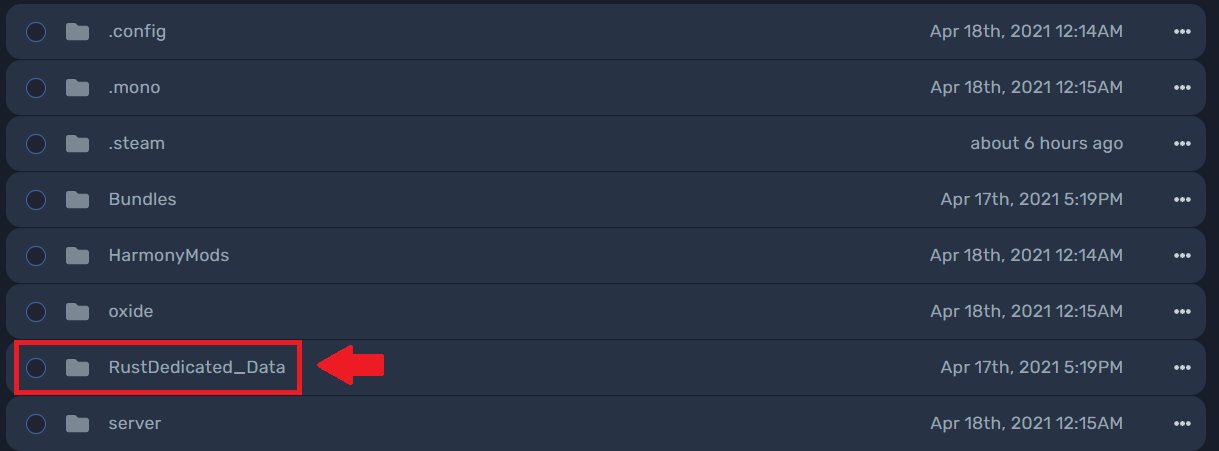
Once you have downloaded the file, navigate to your server page on the panel and click on the File Manager.

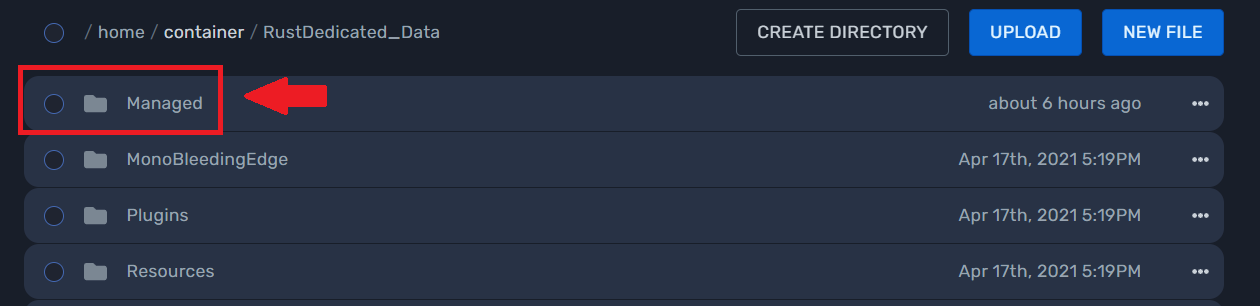
Once in the manager, locate the RustDedicated_Data folder.
Then you should open the Managed folder.
At this point find the "Oxide.Ext.RustEdit.dll" file in your downloads and click and drag it onto the panel webpage to upload it.

Uploading the Custom Map:
Once the extension is uploaded, go back the root of the file manager and open the server folder.
Now go ahead and open the server identity folder. This folder might just be called "rust".
Once inside, open the cfg folder.
Inside this folder, look for the server.cfg file. If it is not there you are going to have to create the file itself. To do so, just navigate to the top right corner and click New File.
Once you do this the editor will open. To save the correct name of the file, click on the Create File button in the bottom left.
Now that file is created, click on it to bring it up and now paste this format: [levelurl "(url)"]. Once this is pasted, you will replace the (url) part with a direct download link to your custom map file. Below you will find an example of what it should look like.
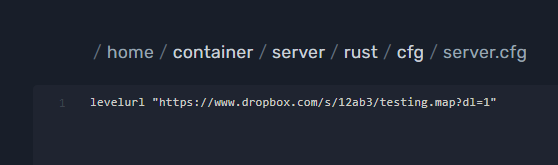
Note: If can use a service like Dropbox to upload your map file, as long as they can generate you a direct link. You can get this link by uploading your file, then create a share link by clicking "Create Link". You can then post that link into your server.cfg file. Make sure that you replace the ?d1=0 with ?d1=1.
Now go ahead and start your server back up and it should load with your custom map!
¶ How to Modify Admins [Non RCON]
Finding the User File
Please make sure you have your server turned off before modifying any files of your server!
To modify who is a admin on your server we need to find the file that containers the users that admins.First, make sure you have the server opened on the panel and click on the File Manager.

Once the files appear, find the folder that says Server.
Inside that folder should just be the server identity folder. For this server it was simply called rust. Go ahead and click on it.

Here there should be only 1 folder followed by a bunch of files. Click on the cfg folder.
Now go ahead and click on the users.cfg file. If this file is not here, you are going to have to create a file and rename it to that file name.

Adding/Removing Admins
Once you are in the users.cfg file, the file might be blank. This is ok since now we are going to fill it. Each line in this file will be a admin user.
So for each admin you want to add, go ahead and use this format: <64_bit_steam_id> <reason/user>
In this code, "64_bit_steam_id" stands for the Steam ID of the user you want to add. To find the Steam ID of a user, you can read our other article for that, located here: How-to-Find-your-Steam-ID
Role will refer to what status you want that user to take up. You will choose either ownerid or moderatorid. If you use ownerid this will grants access to all admin commands and will let the user remove or add other admins, while using moderatorid this will grant access to all admin commands but not allow them to remove or add other admins.
Reason/user will be where you would put the users name.
¶ How to Reset Your Rust World & Playerdata
We recommend that once a month that the server owner reset their maps to keep user interest.
Please Note: Once you reset, all data will be replaced. If you wish to keep you files, please make a backup and download it.
¶ Resetting Playerdata on Your Server:
Firstly, please navigate to your server page on the panel and make sure your server it turned off. If it isn't click the Stop button.
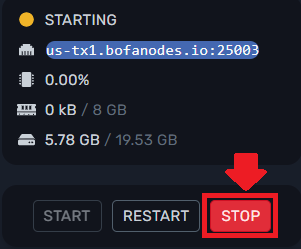
Once you click that button, please what for the server to fully stop before modifying your server files.
Once your server has stopped, go to your file manager

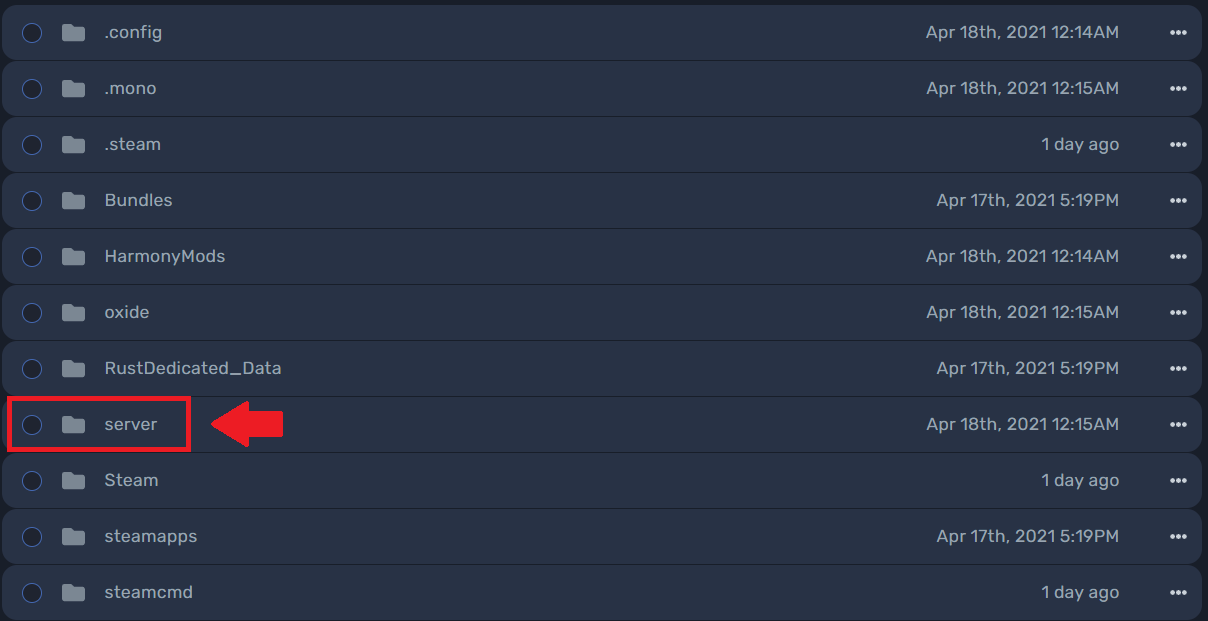
Once there, look for the server folder and click on it.

Inside will be the server folder, if default it should say "rust". Go ahead and click on it.

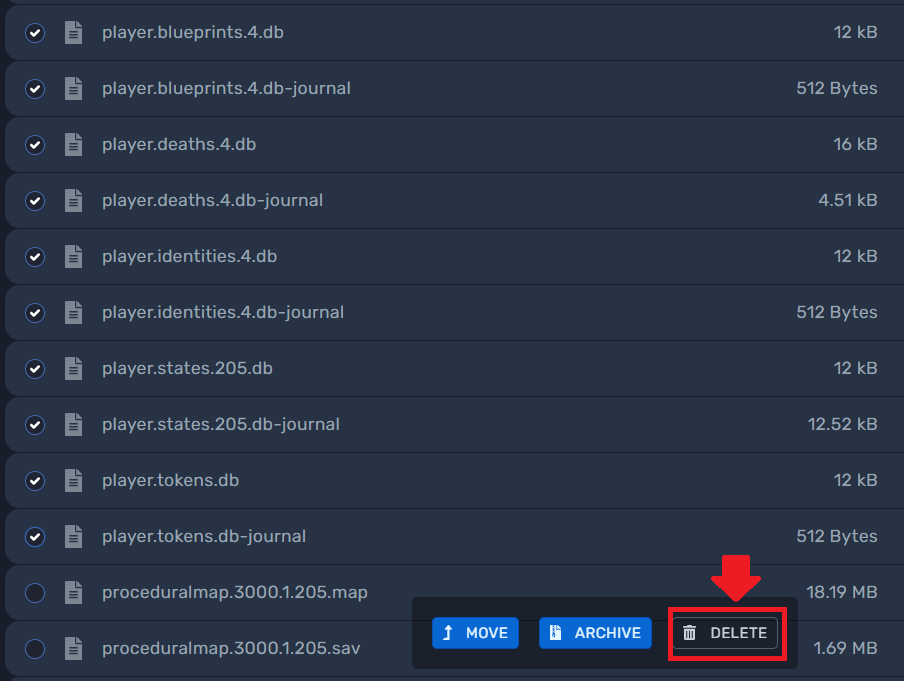
This is where you Playerdata will be stored. To delete it, click on the circle next to the files that have the word "Player" in them. To double check, make sure each file selected are .db file type
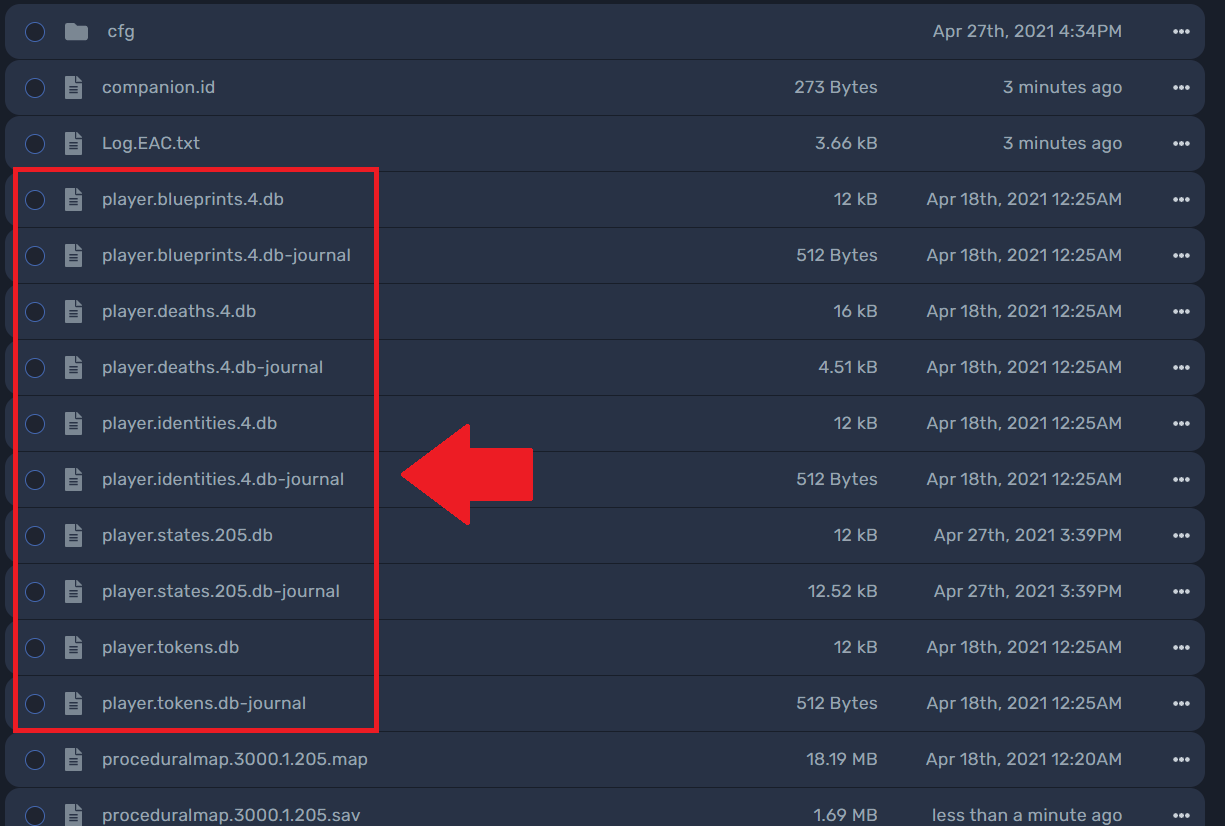
Once you have them selected, go to the top of the page and click the delete button and confirm.
¶ Resetting the World on Your Server:
Please go to the server page on the panel and go to your file manager.

Once there, look for the server folder and click on it.
Inside will be the server folder, if default it should say "rust". Go ahead and click on it.
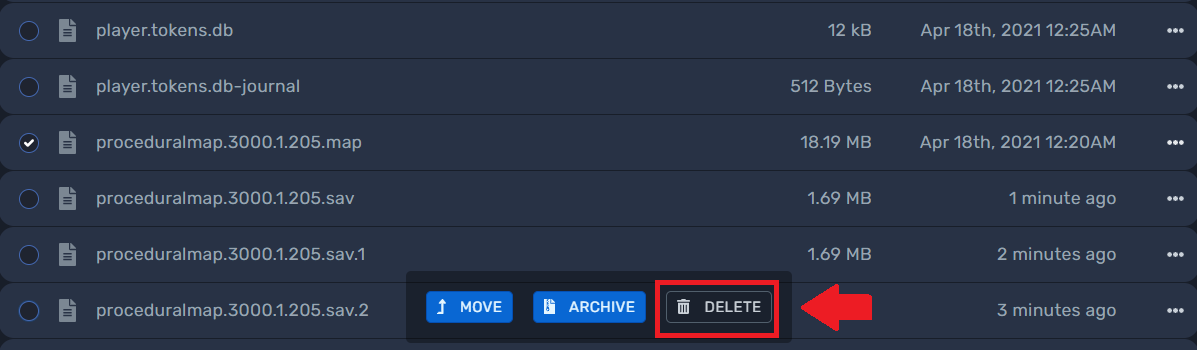
Once inside you are looking for the .map file. If this is not a custom map it should be called "proceduralmap".
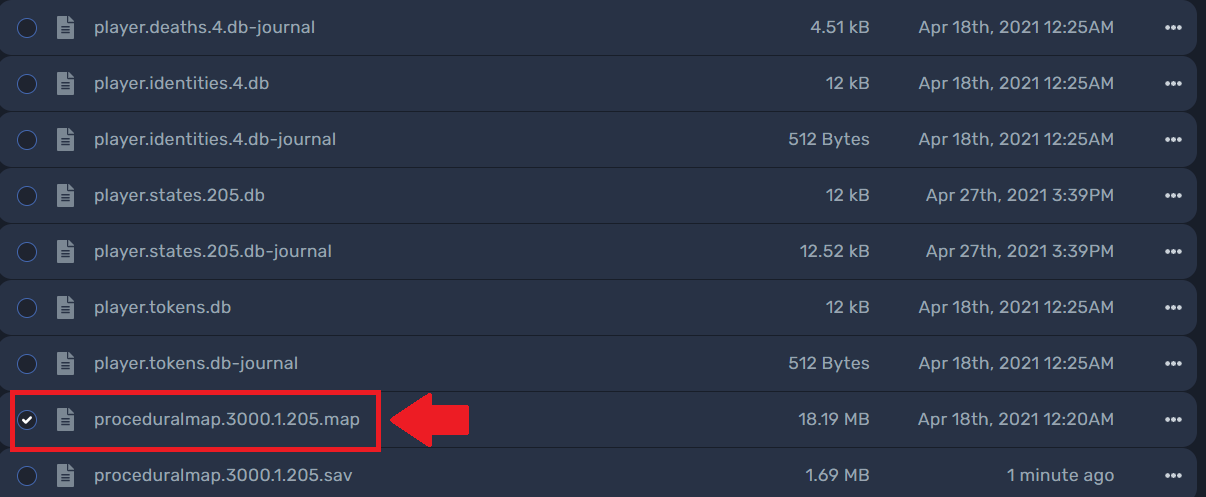
Once you have the file selected, go ahead and click the delete button and confirm.
¶ Rust Mods
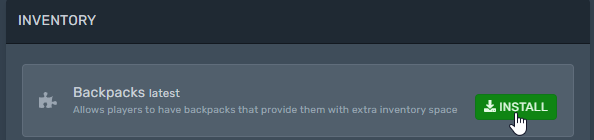
Access the Mod Manager by selecting it on the top of the BOFA Panel
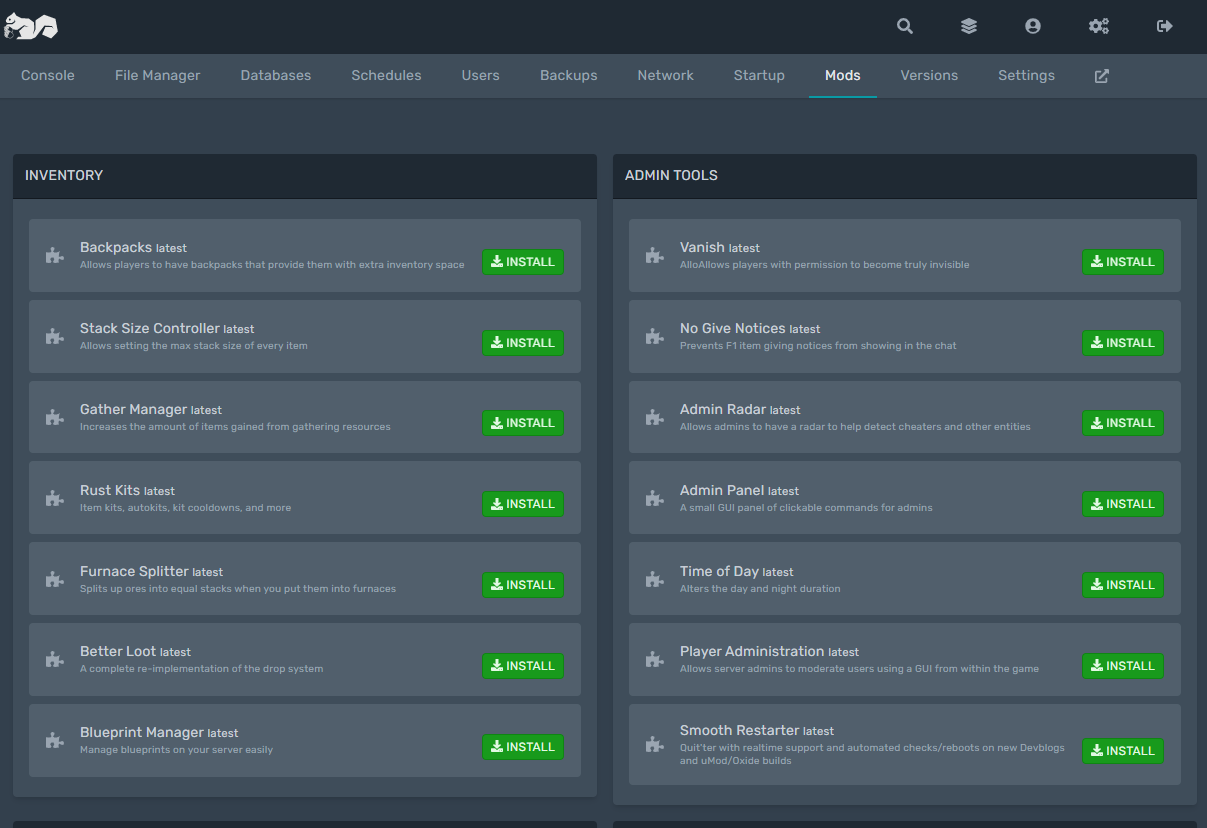
To install a Mod click on the Green install button next to the Mod you would like
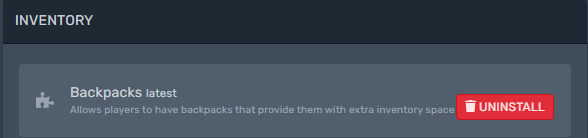
You will now see the Button changed from install to Uninstall, You can click on the Uninstall button to reverse the change
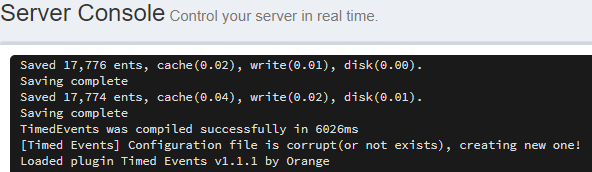
In your Console of the server you should see the mod successfully installed.

To Make changes to the Mod Settings head over to file manager click on the Oxide folder

Then Select the Config folder
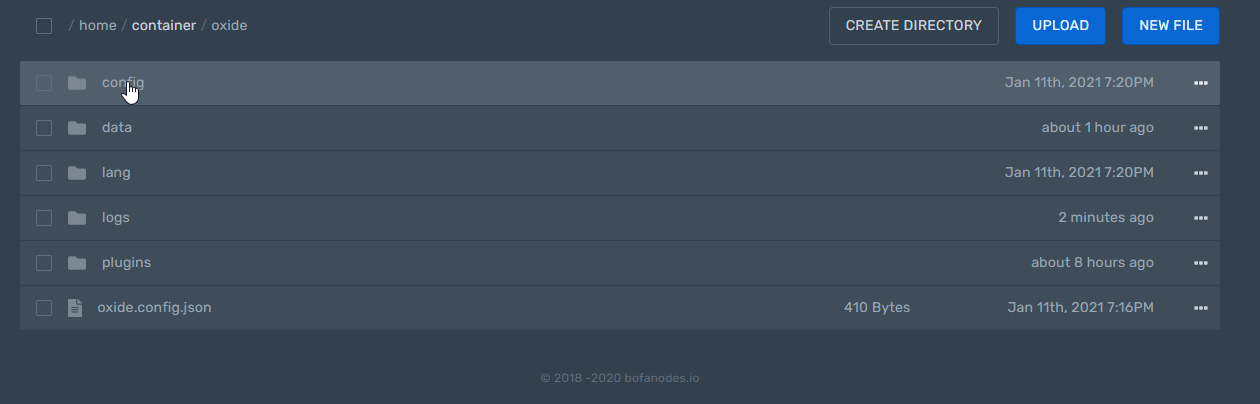
Now Click on the JSON file corresponding to your mod/plugin. In this example you would select the Backpacks JSON file since we installed the Backpacks Mod

Edit the settings according to you liking. Be sure to check Umod.org to be sure that your changes are within the Plugins Guidelines.

Start by going to umod.org and search for your Rust plugin in this example we search for "events"
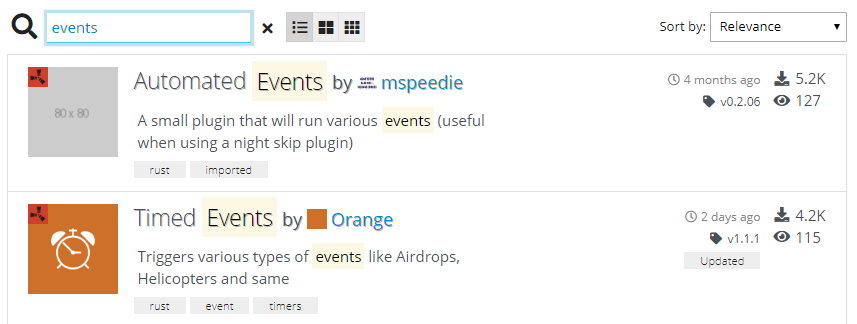
Select the plugin you would like to install

Click on Download on the right side of the page

After downloading the file you can drag and drop the file into the folder /OXIDE/Plugins to install it
Drag it anywhere in the window that is grey in color to upload the file, You can also upload multiple files at the same time using this method
Once the files have uploaded the page will automatically refresh and display your newly uploaded file.
After uploading the file into the plugins folder you should see the plugin being installed while the server is running
To edit the options for this mod go to filemanager in the panel and navigate to /OXIDE/CONFIG and click on the corresponding JSON file
Edit your config files accordingly and be sure to click "Save Content" to save your changes.